Module 1 - Body Panels
Module 1 Build:
<24th August 2005>
Alloy Panels:
So now for the start of the real work!
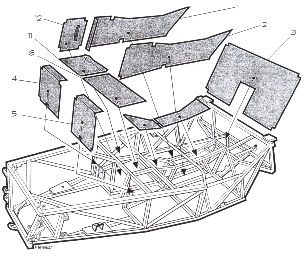
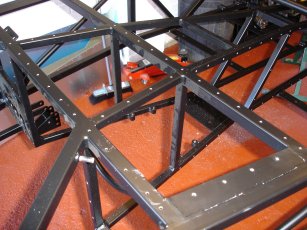
I arrived at the garage around 9:30am and got myself settled, made myself a pot noodle and some coffee, then sat down with the build manual to work out the plan. The first thing i did was went through the panels i could recognise and put then into place to check the kind of fit i should expect. This is actaully suprising good and if it didn't seem to fit very well i found it was the wrong panel! So hats off to westfield for that. The first one to put in place is the transmission tunel side panels. They're quite large and a unique shape so picking to right ones was easy. So time to get to work
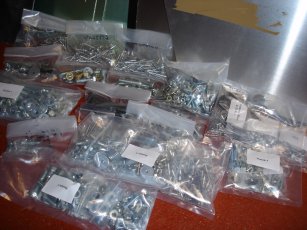
I got my silicon gun loaded with a fresh tube of the silicon Westfield gave me in the kit, then put the drill bit in the drill, then went in search of the pop rivits. This no mean feat as you can see from the picture there are a number of different rivits, bolts, fastenings, etc.. However after much searching i just couldn't find the right rivits! So i called westfield to check that you would normally get them in the kit and they said i should have, gave me some directions of where to look and when they weren't there said they would put some in the post straight away. So after spending a good hour building up the courage to start i was scuppered at the first hurdle!!
| But there was still plenty to do so i got the transmition panel out and attached it to the chassis with a number of 100mm G Clamps, which incidentally, are plenty big enough, the 75mm ones would have been fine for the job. After a number of small adjustments and about half an hour of fine tuning i finally built up the nerve to start drilling the chassis! So using the pre-drilled alloy panel holes as my markers i started to drill. All went very well and despite taking this first panel very slowly i was done in no time. Undoing the G-Clamps and removeing the alloy panel revealed a very neat row of holes through my nice new chassis. After cleaning it down i was ready to move onto the other side. This was very much a case of following the same procedure as the first one but confidence was high and so this side took no time at all. |
|
|
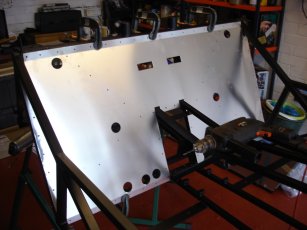
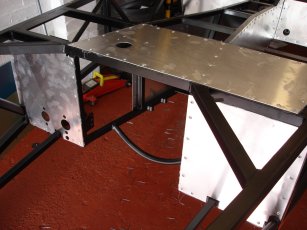
Next up is the back panel, the one thats directly behind the seats in the car. This is a bit more tricky as the panel needs to fit through some chassis crossmembers either side and yet also round the transmission tunnel. After a major struggle and some slightly bent alloy later i get it into place. Then i'm trying to work out how the fixings will work and it hits me... I've put it in the wrong way round!! So getting it out was an equal battle and then i took the time to straighten back out the bits that had bent slightly. Getting it in the correct way round was nice and easy, i don't know if i'd just got the knack of it or if it's just easier the correct way round? But it was in and the fastening was obvious so i got to work on clamping it down. After starting the drilling i soon realised my first drill bit has had it! So onto the second of many and away i go. The top chassis rail is much bigger and hence thicker on this part and so it was a tiring exercise but i got through it and after removing the panel i could see the nice neat row of holes and all was good!
|
 I'm now running short on time but the next panels on the list are the small panels at the end of each footwell. So i figure i'll get those done quickly. They slipped into place quickly and were again a really nice fit. The passenger side was very straight forward and the only reason the drivers was more challanging was due to the pedal mounts blocking my drilling position. However, another drill bit down but the job was soon done, lucky really as i had to go by that point. So hopefully the rivits will arrive tomorrow and i will put the drilled panels from today in place for good!
<25th August 2005>
An early start again this morning! Managed to get in and sorted ready to start drilling as soon as i could without fear of a neighourhood linching. Also brought a radio over this morning so at least have some DJs for company during my day at the garage.
First job today is to drill the scuttle panel to the front top of the passenger footwell, this is where the fuse box will be located. So it got to 9am and I figured i'd make a start, it only took a couple of minutes and it was all done.
This was all i could do now until the rivets hopefully arrive with the post this morning.
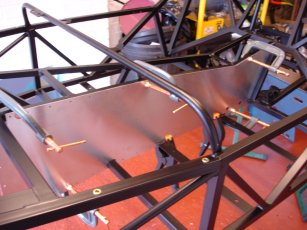
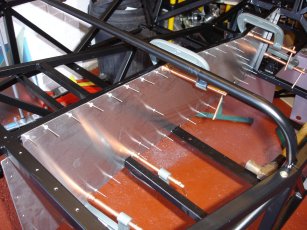
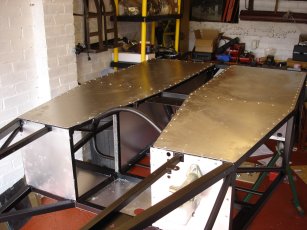
| I see the postman out side on his phone and hope the poor man has had to lug a box full of rivets around with him! Thankfully he has, so i have my box if 500 rivets and it's about 11 o clock. So i put the suspension to one side for a bit and get to work on fitting the panels. I did it in the same order as the drilling so first on is the transmittion side panels. I fitted it in place and then started placing all the rivets in the holes. I'd done about half when i realised i hadn't put the silicon sealent behind it!! Luckily i hadn't actually rivetted any and i could just pull them out. once off i put a nice line of silicon along all the chassis member in contact with the panel, being carefull to ensure all the drilled hole were covered. Then the panel went back on and the rivets put back in, you can see in the top picture the all the rivets in place ready to run around with the gun. This was a painful job! All in all for both panels it took about an hour i'd say and i lost count of the number of obcenities muttered when pinching skin in the gun or just generally looking at the number still left to rivet!
|
|
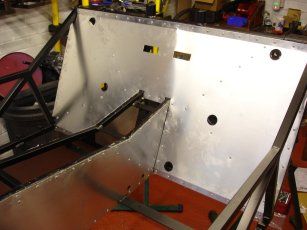 After doing these i took a break and got the pedals out and as much done as possible. But then i kept seeing the big rear bulkhead staring at me waiting to be fitted. It was next on the list so once i'd had enough time to forget just how much i hated riveting i figured i'd get it done. So after a healthy coating of silcon i was ready to fit the panel into place. It was just as much of a pain second time round but i got it in place and located it's position with a couple of rivets. Then it was just a case of going round fitting all the rivets (almost 100 on this panel) into their pre drilled positions and following the same proceedure as before. It was a painstaking process but once it was completed it made a big difference to the appearance of the chassis. You could really see the car emerging and so it was quite satisfying.
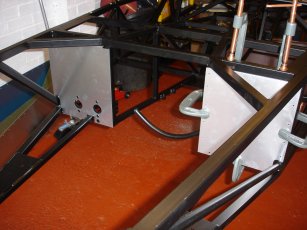
 Time was now against me as after fitting the last few panels the chassis would have to be turned over ready for the bottom panels to be drilled and fitted. This would require some help and i wouldn't be able to get it in the morning. So i quickly siliconed the chassis where the front bulkheads fit and then fitted the alloy panels in place. These are only small but due to the pedal positions some are a bit tricky to get to. It was all in place in no time though and this only left the scuttle panel to fasten and i was good to turn the chassis!
<26th August 2005>
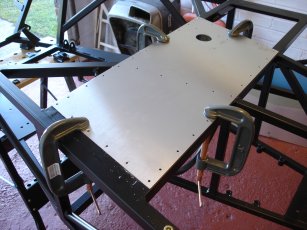
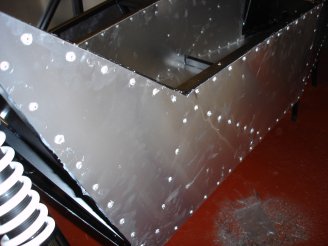
 This morning i had to turn the chassis over so i could work on the underside panels. These are the 2 panels that will form the bottom of the driver and passenger seating area.Following the same process of clamping down the panel, drilling, silicon sealing the chassis, then finally riveting. The first side i did was the driver side, so after drilling i took off the panels, cleaned both the panel and chassis and put on the silicon. After placing the panel back on i started putting in the rivets, i tend to do the corners first to make sure i have the position right, but some of the holes seemed to be in the wrong place? After a minute or two i realised the panel was symetrical and wondered if i'd managed to put in on upside down? After flipping it over and getting covered in silicon it turns out i was right and all the rivets fitted perfectly! I don't know if its because there was now sealent on both side or if it was cause it had time to dry a bit more but the actaul riveting this panel was by far the most painful so far! But they're both on now and it makes a big difference to the look of the chassis
<27th August 2005>
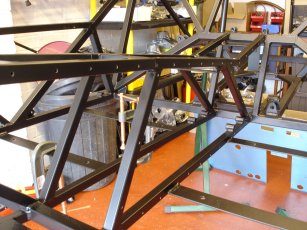
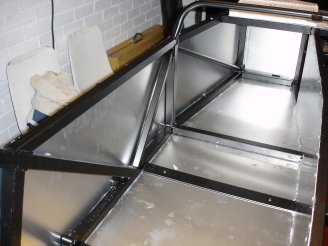
Last of the panels drilled and riveted today!!! So my hands are now free from the main of riveting for a while at least. These were the external side panels so the cockpit is all enclosed now, so as you can see in the photo below it really looks like its ready to sit in! On to the suspension now.

 Copyright ©2012
Kevin Baldwin
Copyright ©2012
Kevin Baldwin


